Saturday 26 March 2022

Adaptive Card error in MS Teams "We're sorry, this card couldn't be displayed"

I have created a Power Automate flow where the adaptive card will trigger the flow when the user selects for a message in Microsoft Teams.

{
    "type": "AdaptiveCard",
    "$schema": "http://adaptivecards.io/schemas/adaptive-card.json",
    "version": "1.5",
    "body": [
        {
            "type": "TextBlock",
            "text": "@{triggerBody()?['cardOutputs']?['actaskTitle']}",
            "wrap": true
        }
    ],
    "actions": [
        {
            "type": "Action.OpenUrl",
            "title": "Open To Do",
            "url": "https://to-do.office.com/tasks/id/@{outputs('Add_a_to-do_(V3)')?['body/id']}/details"
        }
    ]
}

When I select the task from the message:

To fix the issue, go back and edit the flow and change the version from "1.5" to "1.4" and re-run; at this point, you should see the card displays correctly.


Once you click on 'Open To Do', it will redirect you to Microsoft To To:

Saturday 19 March 2022

How to add SPFx webpart to Microsoft Teams tab

Create SPFx new project:

Open Node.js command prompt and run 'yo @microsoft/sharepoint'


Enable the webpart to be deployed as Teams Tab:

Go to TeamsTabWebPart.manifest.jsonàand ensure the “TeamsTab” is exist in ‘supportedHosts’.

Enable Tenant wide deployed if needed

1. In this this example, we will configure this solution as tenant wide deployment, by doing this we won’t have to deploy this solution individually to each site collection.

2. It would be globally deployed to all Site collections from app catalog.

3. However please note that if you don’t want tenant wide deployment of your SPFx solution, you can skip this step. But then to add this app to MS team, you will have to individual add this solution on  MS Team site collection.

4. For Tenant deployment: go to ./config/package-solution.json, add attribute “skipFeatureDeployment”: true like below.

Updating webpart code to be read Microsoft Teams context:

  Ø  Open ./src/webparts/TeamsTab/TeamsTabWebPart.ts for the needed edits on making our solution aware of the Microsoft Teams context, if it’s used as a tab.

  Ø  Update the render() method

   We can detect if solution is hosted by Microsoft Teams by checking the                                                      this.context.sdks.microsoftTeams property.

  public render(): void {

    let title: string = '';
    let subTitle: string = '';
    let siteTabTitle: string = '';
  
    if (this.context.sdks.microsoftTeams) {
      // We have teams context for the web part
      title = "Welcome to Teams!";
      subTitle = "Building custom enterprise tabs for your business.";
      siteTabTitle = "We are in the context of following Team: " + this.context.sdks.microsoftTeams.teamsJs.app.getContext();
    }
    else
    {
      // We are rendered in normal SharePoint context
      title = "Welcome to SharePoint!";
      subTitle = "Customize SharePoint experiences using Web Parts.";
      siteTabTitle = "We are in the context of following site: " + this.context.pageContext.web.title;
    }
  
    this.domElement.innerHTML = `
      <div class="${ styles.teamsTab }">
        <div class="${ styles.container }">
          <div class="${ styles.row }">
            <div class="${ styles.column }">
              <span class="${ styles.title }">${title}</span>
              <p class="${ styles.subTitle }">${subTitle}</p>
              <p class="${ styles.description }">${siteTabTitle}</p>
              <p class="${ styles.description }">Description property value - ${escape(this.properties.description)}</p>
              <a href="https://aka.ms/spfx" class="${ styles.button }">
                <span class="${ styles.label }">Learn more</span>
              </a>
            </div>
          </div>
        </div>
      </div>`;
  }

Updating .SCSS file to fix the styles which we used in webpart file:

  Ø  Open ./src/webparts/TeamsTab/TeamsTabWebPart.module.scss and update the below classes:

@import '~@microsoft/sp-office-ui-fabric-core/dist/sass/SPFabricCore.scss';

.teamsTab {
  overflow: hidden;
  padding: 1em;
  color: "[theme:bodyText, default: #323130]";
  color: var(--bodyText);
  &.teams {
    font-family: $ms-font-family-fallbacks;
  }
}

.container {
  max-width: 700px;
  margin: 0px auto;
  box-shadow: 0 2px 4px 0 rgba(0, 0, 0, 0.2), 0 25px 50px 0 rgba(0, 0, 0, 0.1);
}

.row {
  @include ms-Grid-row;
  @include ms-fontColor-white;
  background-color: $ms-color-themeDark;
  padding: 20px;
}

.column {
  @include ms-Grid-col;
  @include ms-lg10;
  @include ms-xl8;
  @include ms-xlPush2;
  @include ms-lgPush1;
}

.title {
   @include ms-font-l;
   @include ms-fontColor-white;
   background-color: $ms-color-themePrimary;
  }
  
.subTitle {
  @include ms-font-l;
  @include ms-fontColor-white;
 }
  
.description {
  @include ms-font-l;
  @include ms-fontColor-white;
 }

 .button {
   // Our button
   text-decoration: none;
   height: 32px;
  
   // Primary Button
   min-width: 80px;
   background-color: $ms-color-themePrimary;
   border-color: $ms-color-themePrimary;
   color: $ms-color-white;
  
   // Basic Button
   outline: transparent;
   position: relative;
   font-family: "Segoe UI WestEuropean","Segoe UI",-apple-system,BlinkMacSystemFont,Roboto,"Helvetica Neue",sans-serif;
   -webkit-font-smoothing: antialiased;
   font-size: $ms-font-size-m;
   font-weight: $ms-font-weight-regular;
   border-width: 0;
   text-align: center;
   cursor: pointer;
   display: inline-block;
   padding: 0 16px;
  
   .label {
     font-weight: $ms-font-weight-semibold;
     font-size: $ms-font-size-m;
     height: 32px;
     line-height: 32px;
     margin: 0 4px;
     vertical-align: top;
     display: inline-block;
     }
   }

.welcome {
  text-align: center;
}

.welcomeImage {
  width: 100%;
  max-width: 420px;
}

.links {
  a {
    text-decoration: none;
    color: "[theme:link, default:#03787c]";
    color: var(--link); // note: CSS Custom Properties support is limited to modern browsers only

    &:hover {
      text-decoration: underline;
      color: "[theme:linkHovered, default: #014446]";
      color: var(--linkHovered); // note: CSS Custom Properties support is limited to modern browsers only
    }
  }
}

Check and verify teams icon and outline:

To sync  SPFx webpart to Teams, we need to make sure our solution has color and outline png file which is required. You will find this files in teams folder in your project root directory.


Package and deploy your webpart to SharePoint:

  Ø  Execute the following commands to build bundle your solution. This executes a release build of your project by using a dynamic label as the host URL for your assets.

gulp bundle --ship

  Ø  Execute the following task to package your solution. This creates an updated teams-tab-webpart.sppkg package on the sharepoint/solution folder.

gulp package-solution --ship

  Ø  Next, you need to deploy the package that was generated to the tenant App Catalog.

  Ø  Go to your tenant's SharePoint App Catalog.

  Ø  Upload or drag and drop the teams-tab-webpart.sppkg to the App Catalog.


Saturday 5 March 2022

Post Adaptive Cards to Teams channel or chat and wait for a response using Power Automate

 1.       Create SharePoint List that will be used as data Input source: Invoice Request

a.       Columns: Title; Status – Both are ‘Single line of Text’ column type

    2. Create SharePoint List that will be used as source to fetch the dynamic data for reason based on department: Rejection

a.       Columns: Department(renamed Title column)

b.       Rejected Reason (Single line of text)

c.       Populate some data in Rejection list which will used in Adaptive Cards.

     3. We will use Power Automate flow that will automatically post an Adaptive Card to Teams Channel or Chat once the item is created in ‘Invoice Request’ list.

     4. Create a Flow and the set the trigger ‘When an item is created or modified’

      5. Add two Initialize Variables: VarSales and VarIT

     6. Create two Array Variables: varSalesReasons, varITReasons which will be using to append the data to Adaptive Cards.

     7. Create another two String Variables: SalesResponse, ITResponse which will using to capture the response that is submitted by approver.

     8. Add ‘Get Items’ actions to filter and fetch the rejection reasons for ‘Sales’ department.

     9. In Apply to each, Append all the items to an array while incrementing.

     10. These values appended to the varSalesReasons Array which will be used later when composing the adaptive card. Expression for both title and value:

body('Get_Sales_team_rejection_reason_from_Rejection_list')['value'][variables('varSales')]['Reason_x0020_for_x0020_Rejection']

      11. Add ‘Compose’ action to compose the adaptive card message.


Below is the JSON code that used to compose the adaptive card:

{

  "type": "AdaptiveCard",

  "$schema": "http://adaptivecards.io/schemas/adaptive-card.json",

  "version": "1.2",

  "body": [

    {

      "type": "TextBlock",

      "text": "Sales Team Approval Request submitted by @{triggerOutputs()?['body/Author/DisplayName']}",

      "wrap": true,

      "id": "Request_Head",

      "size": "Medium",

      "weight": "Bolder",

      "horizontalAlignment": "Center"

    },

    {

      "type": "TextBlock",

      "text": "@{triggerOutputs()?['body/Title']}",

      "wrap": true,

      "id": "Request_Body"

    }

  ],

  "actions": [

    {

      "type": "Action.Submit",

      "title": "Approve",

      "id": "Approve",

      "style": "positive"

    },

    {

      "type": "Action.ShowCard",

      "title": "Reject",

      "card": {

        "type": "AdaptiveCard",

        "body": [

          {

            "type": "TextBlock",

            "text": "Please select a reason for rejecting the request.",

            "wrap": true,

            "id": "Rejection_Heading"

          },

          {

            "type": "Input.ChoiceSet",

            "choices": @{variables('varSalesReasons')},

            "placeholder": "Placeholder text",

            "style": "expanded",

            "value": "@{body('Get_Sales_team_rejection_reason_from_Rejection_list')['value'][0]['Reason_x0020_for_x0020_Rejection']}",

            "id": "Choices"

          }

        ],

        "actions": [

          {

            "type": "Action.Submit",

            "title": "Reject",

            "id": "Rejected",

            "style": "destructive"

          }

        ]

      },

      "id": "Reject",

      "style": "destructive"

    }

  ],

  "id": "Adaptive_Card"

}

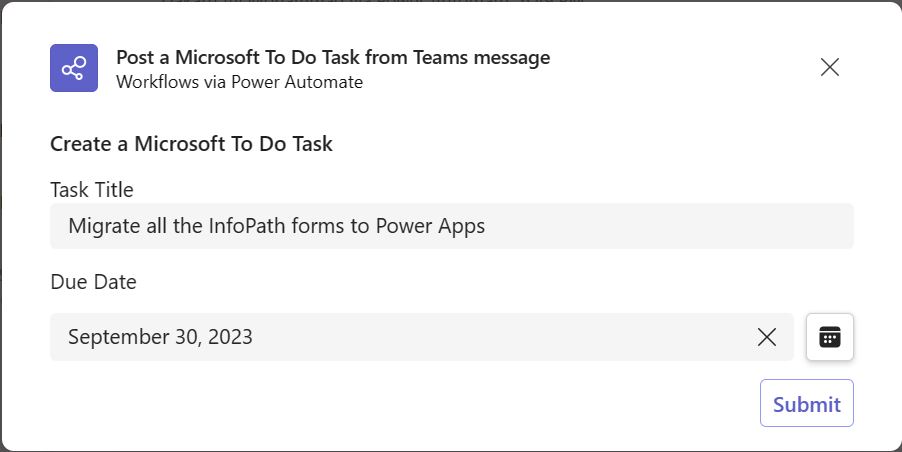
   12. Post an adaptive card to Sales channel or chat and wait for response.

13.  AC will be posted to Sales team channel once the request is submitted in the list. And it will look like below

    14.  Approver can Approve or Reject. If the approver clicks Reject, then department specific rejection reasons will show up on the AC.

    15.   Let’s capture the AC Sales team response in varSalesResponse variable.

@{body('Post_an_Adaptive_Card__and_wait_for_a_response')['submitActionId']}
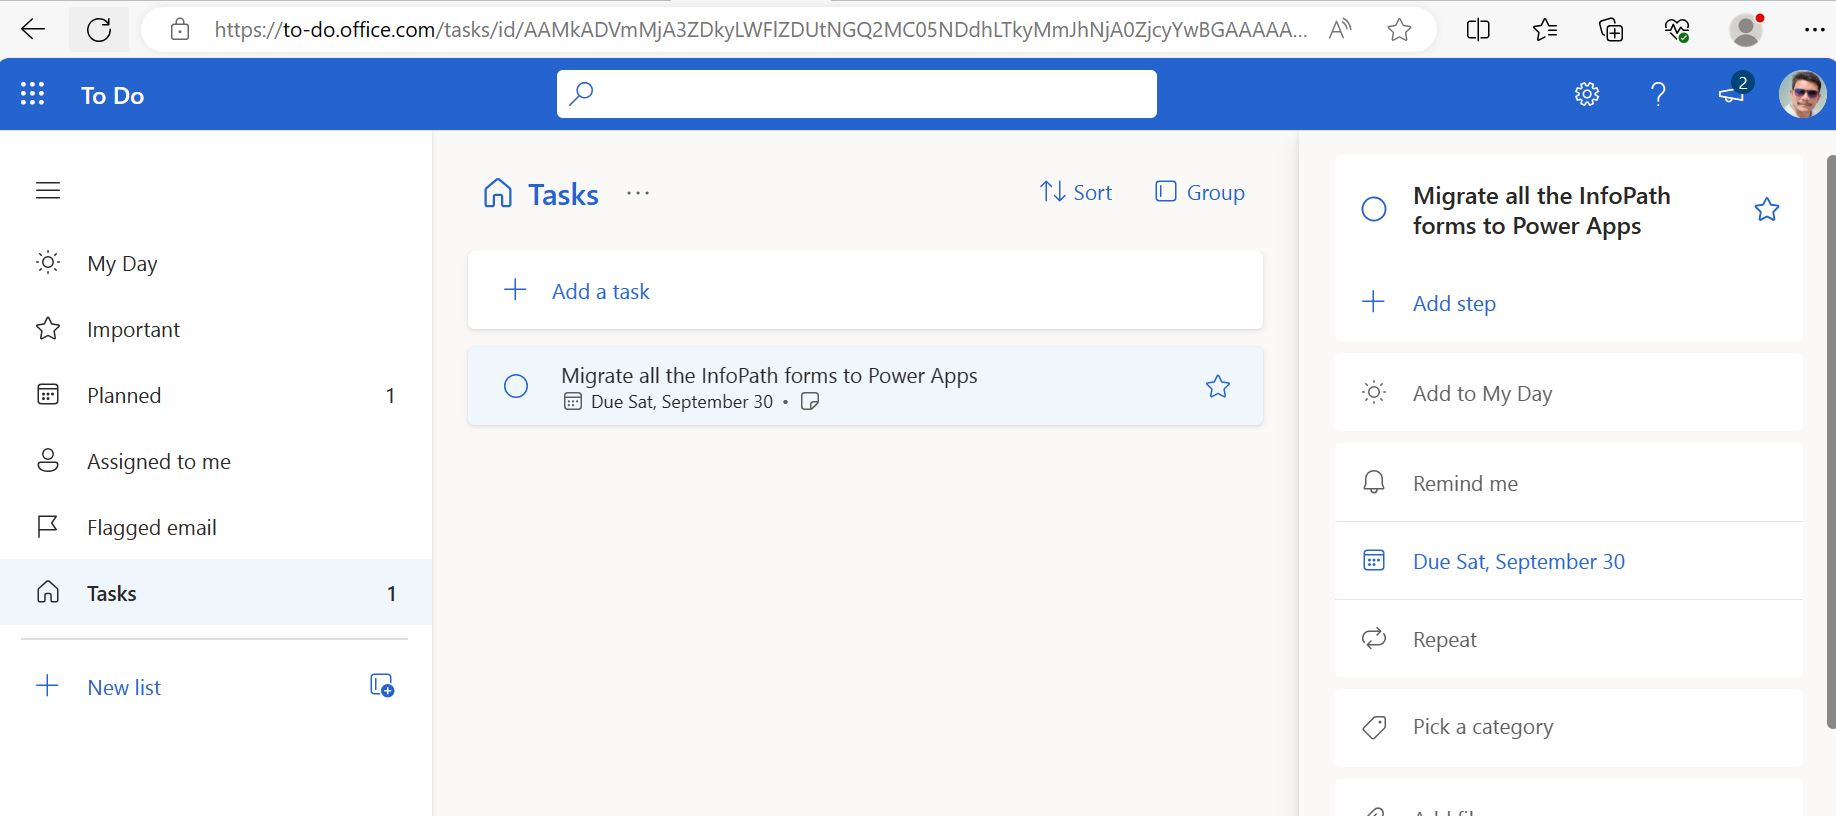
    16.   Once we receive the response, update the same in the ‘Invoice Request’ list.


    17.   Note: I have created below two columns(as flags) to skip the infinite trigger loop in update item action.

a.       SalesApprovalSent – Default value is: No

b.       ITApprovalSent – Default value is: No

    18.   If the Sales team approves the request, it will then be routed to IT team for further approvals.

    19. For this add a condition to verify the outcome of the Sales team approval response(varSalesReponse).

    20.   Repeat the steps from 8 to 17 for IT approval process and replace Sales with IT.

    21.  If the Sales Approver approve the request in 14th steps then it will be routed to IT team approvals and below the AC will be posted in the Sales team channel or chat.

    22.   Capture the IT team approver response in varITResponse variable.

@{body('Post_an_Adaptive_Card__and_wait_for_a_response_3')['submitActionId']}

    23.   And then update the status in the ‘Invoice Request’ list.

    24.   Note: I have added the below expression in the ‘When an item is created or modified’ trigger conditions.

@not(equals(triggerOutputs()?['body/SalesApprovalSent'],'Yes'))